Another week flew by, so it’s time for another stitch school entry. This week is the fly stitch. It’s not so uncommon as some of the others, so no doubt many of you are already familiar with it, but it’s one of my favorites, so here it is! This is another stitch formed in two strokes, which makes it easy to think of lots of variations.
The stitch
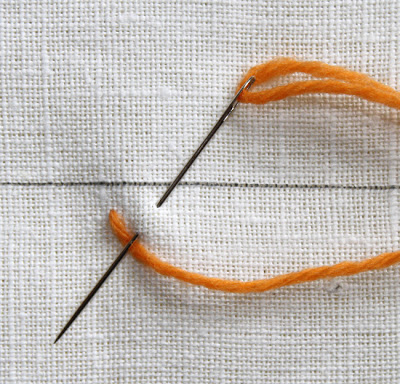
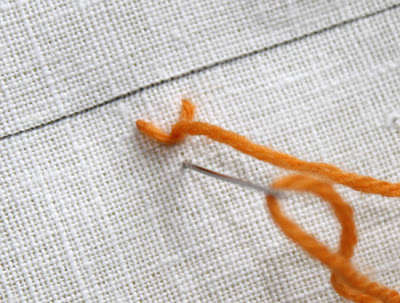
Bring the needle down over to the right, in line with where the needle came up, and then up at a point lower and in the middle of the top two points.
Pull the needle through, then make a short straight stitch to anchor down the loop.
The variations
Easy enough, now for a bunch of variations:
Variation 1
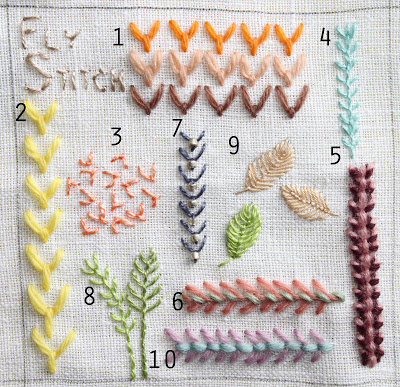
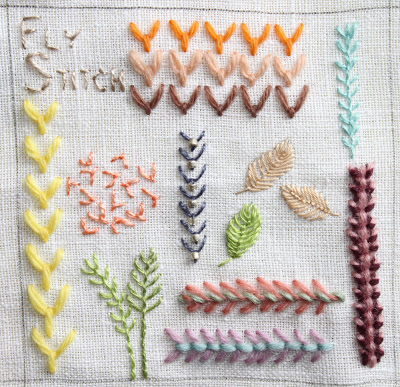
Who says the fly stitch can’t be a filling stitch? Line them up in horizontal rows and there you go. Switch colors and add some shading along the way.
Variation 2
Line them up vertically. As you seen in my sampler, they become larger as I went down. This wasn’t done purposefully, but it’s good anyways, shows how you can vary the size a bit.
Variation 3
Again, they can be a filling stitch, this time scattered about at random angles.
Variation 4
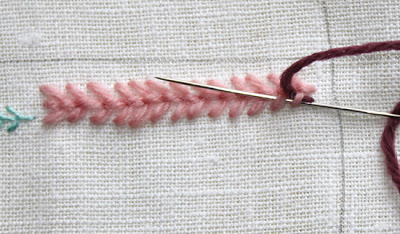
This is one of the primary ways of forming the fly stitch, the stitches are stacked up vertically with no space in between. You can start out with a small straight stitch at the top.
Form the stitch as you would for a single stitch. But on the second stitch, the side spokes, need to be formed much closer to the first set. The vertical straight stitch begins where the one above ends.
Variation 5 and 6
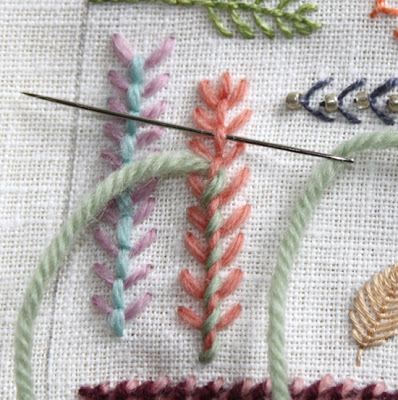
I did something like this for the wheat ear stitch. Basically the fly stitch can be whipped, threaded and wrapped in many different ways. For varation 5, after making the basic line of stitches, bring up your needle with a second thread, and wrap it around each stitch on both sides.
For variation 6, after stitching a row of fluy stitches, bring the needle up at the bottom and thread it through the vertical stitches.
Variation 7
For variation 7, I added a bead to the small vertical stitches. The stitches are lined up, but they don’t touch each other.
Variation 8
The fly stitch lends itself very well to making fronds.You can make them the same width as you go down the frond or maybe widen them a bit at the bottom. For the stem, back stitch or stem stitch work well.
Variation 9
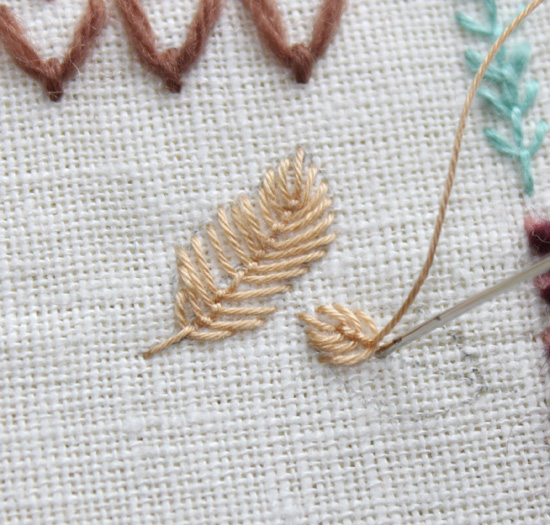
The fly stitch can be used to make leaves with nice texture. To do this, make the stitches vary close together – the vertical stitches will be very small.
Variation 10
If you can keep track of two needles, try two colors. Note – the vertical stitches end up being more like back stitches, otherwise you go down and up in the same hole.
I hope you enjoyed this week’s lesson! Grab some fabric and experiment a bit. Many of the variations I make up as I go along.





I really like the fronds and the leaves. Thanks for another great tutorial.
I'm usually a "same old stitch" girl, but you are making me rethink my ways! These are awesome!
Thanks so much for doing these posts, I'm learning so much, and even more than that, I am inspired to hunt out a stitch encyclopedia and force myself to go beyond back stitch in my next project! Your pictures and instructions, though, are so much clearer than the stitch books I've seen. Looking forward to next week!
Oh wow,,,,this is fabulous that you show us these stitches!!! Wonderful directions and I can actually follow you!!! SUPER!!