Raised chain band is a nice stitch for adding lots of interest and texture to your projects. It is medium in difficulty, but really is quite easy to master. The stitch is made in two steps, so it lends itself quite readily to lots of variations.
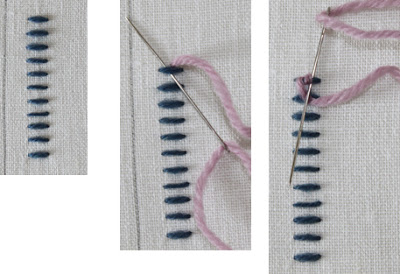
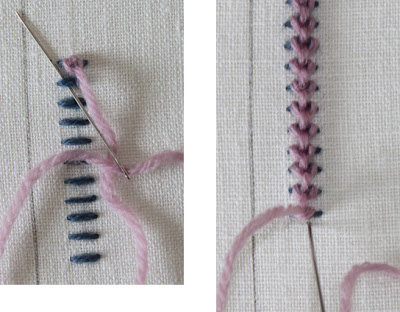
Step one is to make evenly spaced horizontal stitches of equal width. Next bring up your needle up just above the top-most stitch in the center. Then bring the needle over and under the top stitch. Next bring the needle under the top horizontal again on the other side of the center and wrap the thread under your needle as in a chain stitch.
Repeat the stitch by bringing the needle over and then under the next stitch again and then form the chain stitch as above. Continue down the row of stitches.
At the end bring the needle down to the back of the fabric.
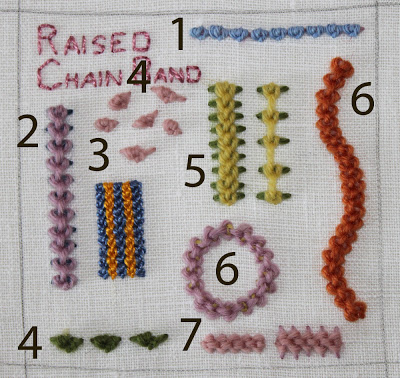
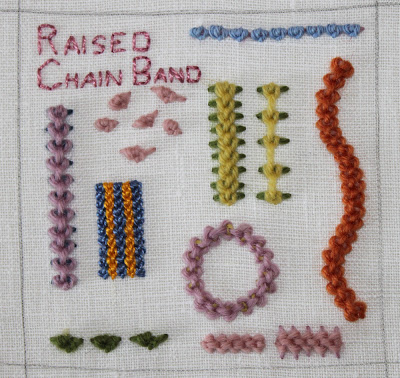
The picture shows some variations on this stitch that I could come up with.
-
A horizontal row of single stitches line up one after the other.
-
A regular row of stitches. You can do them in many color variations. This example has 2 colors, but you can add more color either with variegated floss, or perhaps putting two different colored strands on the needle.
-
This is an example of a filled area. The horizontal bands are wider such that several line of stitches can be made. If you do this, make sure the horizontal stitches are not too loose. Don’t pull too hard on the chain stitches as you make them or you will distort the horizontal stitches. Also, if you are filling an area more than an inch or so in width, make more horizontal bands across the width. Be sure to overlap them a bit, so you don’t get strange breaks when you make the rows down.
-
Single stitches with different widths for the horizontal stitches, or try them lined up evenly with a small space between.
-
This is a comparison with the horizontal bands close together and farther apart.
-
Curves and circles are no problem. Just make sure to space the band stitches closer on the inside of the curve and a bit wider on the outside, like spokes.
-
Here you see a comparison of wide and narrow horizontal stitches.
I didn’t even get to making variations with beads. It should be quite easy to add a bead at some point where you make the chain stitch.
This is a great stitch to try! It’s well-suited to tree trunks, for example. Other things with a bit rough texture could be interesting too, such as rooves or flower stems.


Thats a wonderful stitch Emily x
Your tutorials are the most thorough I've ever seen! I may actually learn a new stitch, FINALLY! Thank you so much for doing this.